Showing posts with label furniture. Show all posts

Friday, November 4, 2022

Blanket Chest

 This is the next piece in our bedroom furniture.  This gets the sheets and blankets out of my son's closet.  This project posed some design concerns.  The first one was how it was going to fit in with the rest of the bedroom furniture.  I am using a mission style.  I have kept open sides but the chest cannot have open sides or front.  There were a lot of different ideas that I had to accomplish this look.  The one that I settled on was grooving all the cherry parts and the walnut was in insert panel.  


Another design concern was the weight of the lid.  The lid is made of three pieces of 1 3/4" thick cherry.  The total weight of the lid is 35 lbs.  I did not want the lid slamming shut and hurting someone.  There is not a lid stay on the the market, that I could find, to handle a 51" x 21" top with that weight.  I did find torsion hinges from Rockler that I liked.  The calculator does work but it said my top was too big.  If I took the lid and divided it into two lids, it said to use 2  - 60 inch-pounds torsion hinges.  So it takes 240 inch pounds to open the chest.  The lid does not slam shut.  I am happy the way the lid turned out.

The lesson learned from the lid is that the case needs to be heavier than the lid.  It does once it was filled.  When it wasn't, it was a tipping hazard.  

Other designs features that are part of the chest:

  • The bottom of the chest is made from tongue and grooved aromatic cedar,  It is said to repel bugs so I put it in our of tradition
  • The top has two battens that are installed with sliding dovetails.  This is the first time using this type of joint,  I did not execute it as well as I had hoped but it still works to keep the top flat.  This was the part that I was most nervous about because if I screwed it up it is a lot of wood that becomes firewood,
  • All joints are mortise and tenons.  I made these using a router instead of hand chopping them out.  This seemed to be easier then drilling and cleaning them out.  They were a more consistent making the tenons easier to make.
  • Inserts are walnut.  I was going to make them out of maple for the contrast.  I am glad I didn't.  The cherry will darken over time.  The two wood tones will compliment over time.
  • The front was originally going to look like two drawers.  It was not going to look as good.  I was also going to add an internal tray.  That also was removed.

I really like how the features come together.  This was a challenge in getting all the lines to line up and offsets look the same.  There are a couple of things that did not go as plan.  The parts for the sides should have been the same for the front and back.  I was off by 1/4".  It all worked out.  
The other design feature is the inserts are not glued into the center curved pieces.  This is to allow the wood to expand and contract.  It may never cause a problem but I did not want the joints to break over time.
I like how the project turned out and it fits with the other bedroom furniture.  The next piece is going to be the chest of drawers.  That is next year

Sunday, April 3, 2022

Kid's Workbench

In preparation of making my own work bench, I made a smaller one for kids.  I used an old kitchen island wood top that I had acquired some  time ago.  The other wood and was gathered from scrap and trash from work.  The only cost that I had in the bench was hardware and labor, which was  not cheap.  It was a good practice and design check for my workbench I hope to make later this year.  Here are the highlights of the project:

  • First of all this was designed around the height of my youngest.  It is a little taller than it should be for him.  He does think it is his now.  Kids are taller than I first thought.  My bench is going to be 35".  I am six feet (almost).  Half of 48" is 24".  Good thing I tested before assembly.  I added another 3" to it and made it a better height.
  • Drawers are shallow for a reason.  I don't want a lot of stuff in them.  It is mainly for kids and storage of their tools.  I am hoping to put foam with cutouts for all the tools.  This is a project for another day.
  • When making five piece side make sure the glides span the two verticals.  I did not check and had to set my glides back 3/4" so I could attach them.  Not impossible, just make the task more difficult.  
  • The only drawer that was designed for a purpose was the paint drawer.  All other drawers were made with the same height drawers.  This may not have been the best idea as some tools don't fit as well.  My bench will have more specific drawers and design.
  • I purchased a mobile base from Grizzly Tools.  I am pleased with the result.  It does roll smoothly and carries the weight.  my only complaint is that it does not work well with 3/4" board.  It says that it will work with 1/2-1 1/4 board but the screws for the 3/4" board drag on the floor every once in a while.  The 1/2" board works great.  Since I screwed the base also into the work bench frame I am not concerned about bowing of the base.
  • I also purchased t-track from Rockler and some of the accessories.  I put this around  the parameter of the bench to make a cheap set of vices.  I did not leave enough material below the track for the clamps to work well.  This is something that I will remedy with my bench.  

It is not the best work I have done but it does function.  My youngest is happy with it.  It is a good addition to the shop as I start working with more kids.  I enjoy the mobility of the bench and the storage it has.

Wednesday, August 12, 2020

Bedroom Furniture: Bookselves

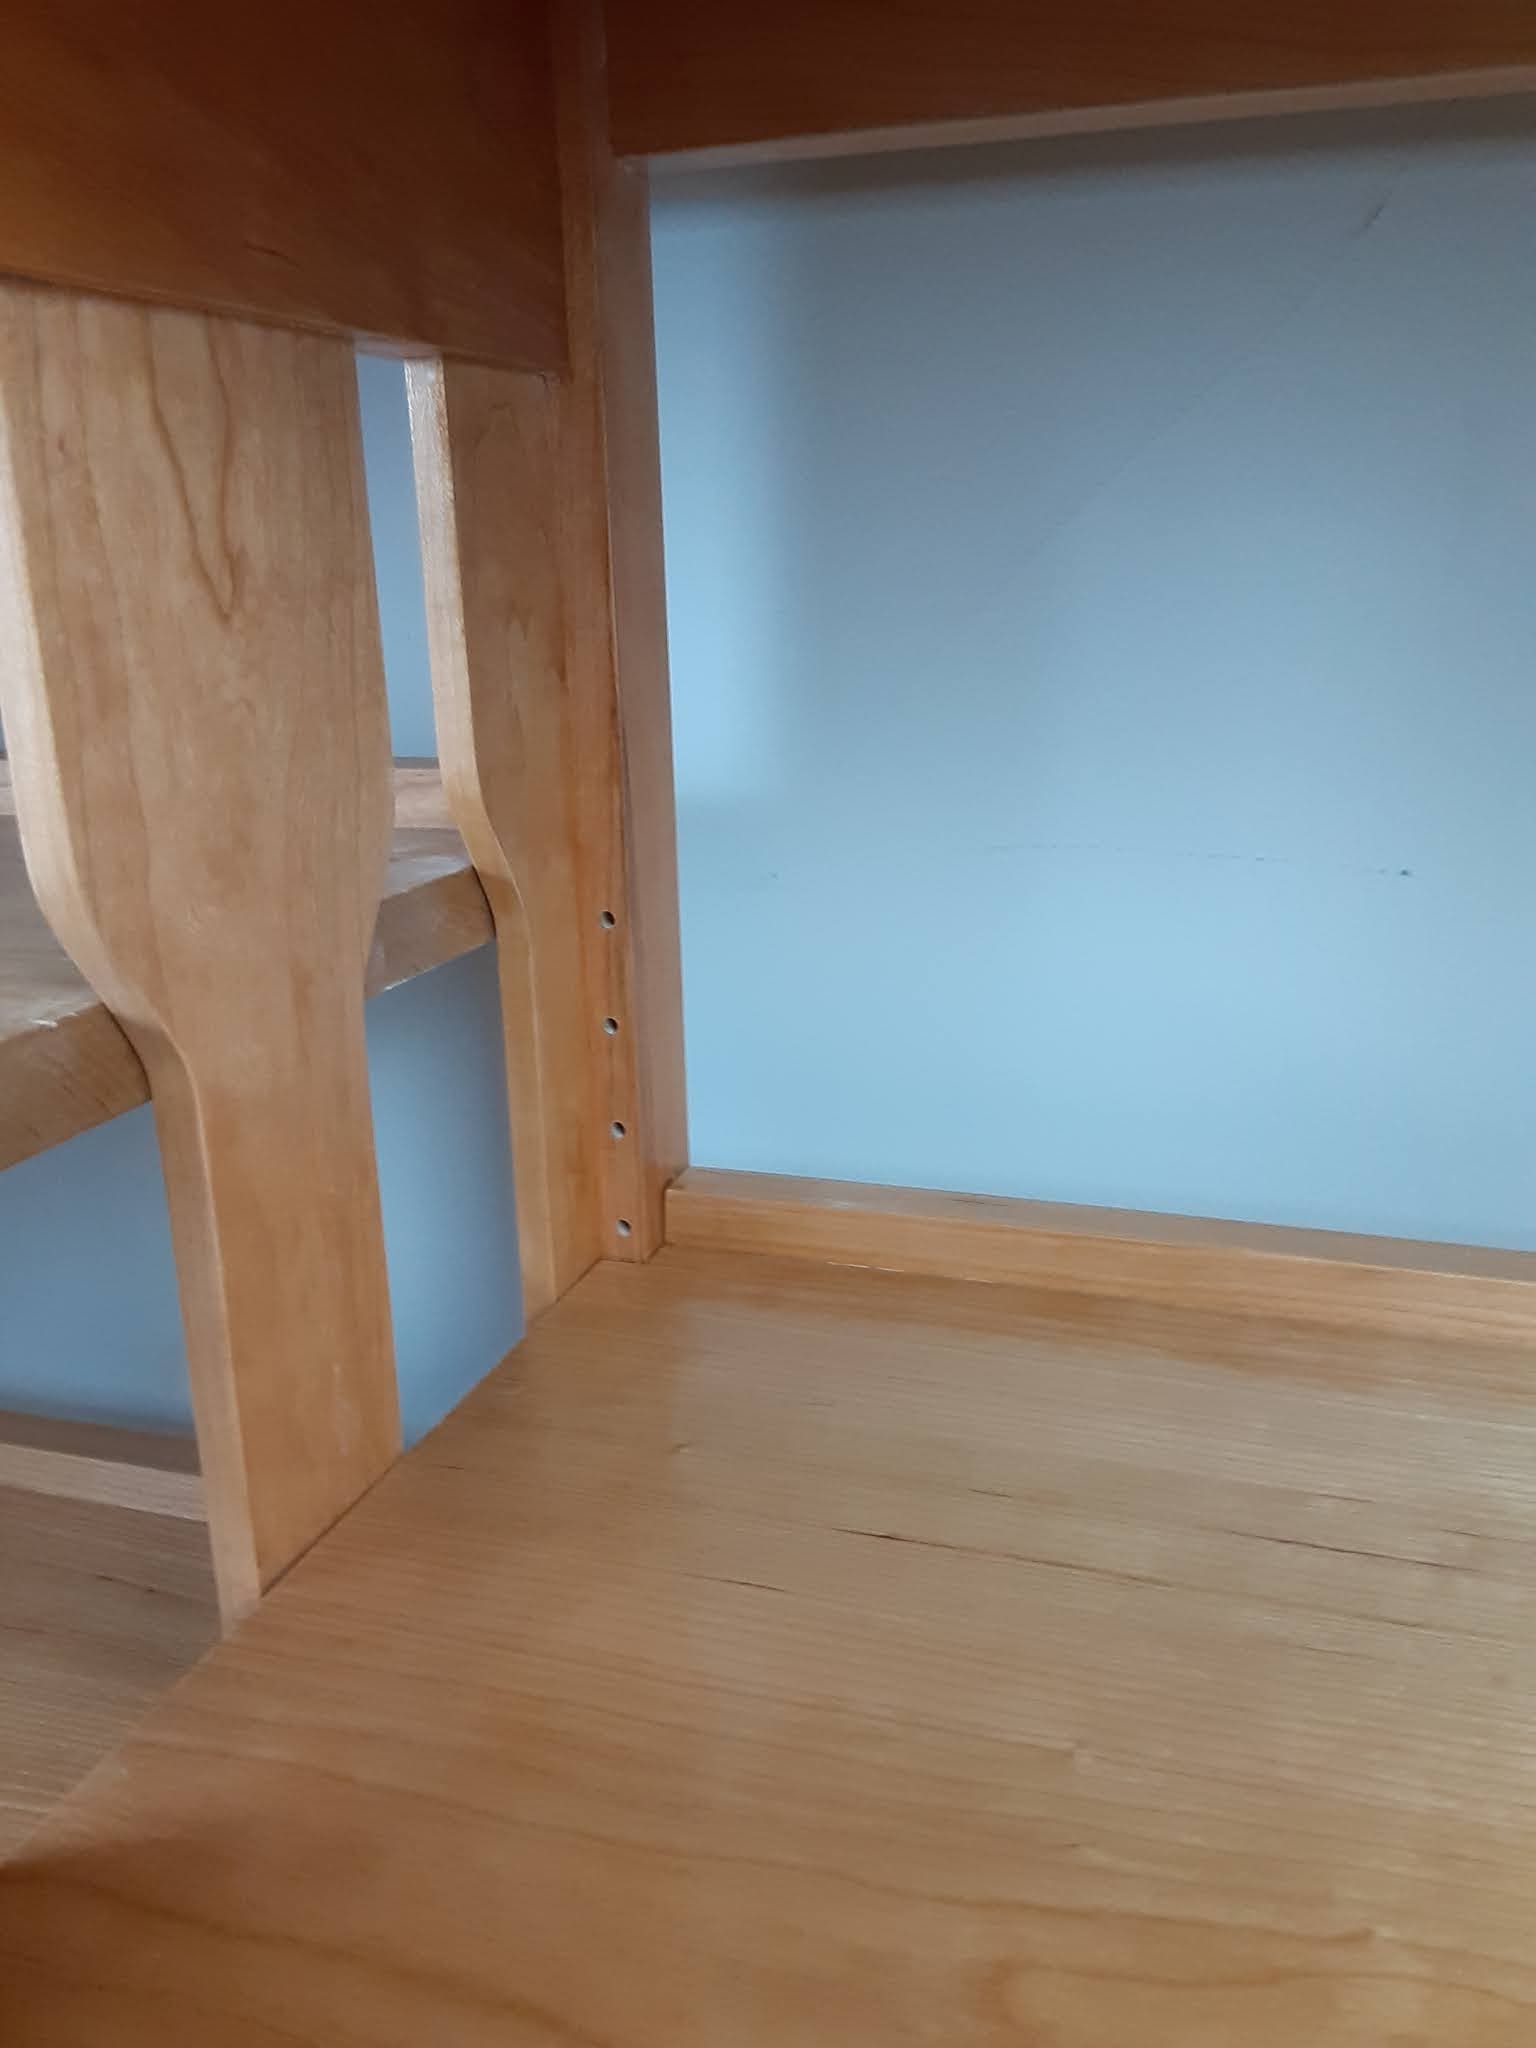
I recently completed the bookshelf for our room.  It is in the same design as the other pieces of furniture.  The bookshelf has open sides with slats and two sections.  One side has one adjustable shelf and the other side has two adjustable shelves.  I did not do a complete design of this, only sketches like the other pieces.  It was designed at 15" seep to handle some of our photo albums. Looking back, I probably could have reduced the depth to 12" and put the photo albums elsewhere.  It is deep but it does work.

The construction of the unit is very similar to the night stands with thicker legs and top.  I purchases 8/4 (1 3/4") thick lumber instead of 6/4 (1 1/4").  That was not planned but it looks good because it is a larger unit.  I used the slats to hide the shelf hardware.  the concept work well.  I used a template to make sure the hole spacing was consistent on each of the legs.  I used a router this time to cut the grooves in the rails that hold the slats in place.  I was hoping this would be more consistent than the dado stack on the table saw.  It was for all but one of the rails.  I am not sure what happened with the one piece.  It all worked out in the end since I cut the slats thick.  I did find out that I do need a better slot cutter than the one that came in the multi pack. The one I have dulled after half way through the parts and started to chip out on the edges.  All joints are mortise and tenon and I would hope that I would have become a little better.  I don't think I have improved much.

The cabinet is totally over designed.  It is all solid wood, even the shelves and bottom panel.  The shelves are 7/8" thick.  I now buy rough lumber, so I just plane to get the defects out and that is the final thickness.  I did have a little issue with the glue up this time.  I glued up the right side panel and left side of the center piece.  with hand cut joints each one fits in one spot.  I had to clean out a lot of epoxy.  The good part was my loose joints were no longer loose.

I am happy with the project and how well it goes with the rest of the set.  I think I will be doing a printer stand next.  I need to test a look before I put design it into the headboard


Tuesday, June 30, 2020

The New Computer Desk


This project went a little faster than expected.  I was working more from home and needed something in a quieter place than the family room.  A desk was planned for our room, it just moved up in priority.  It is a very similar design to the nightstands and constructed in the same manor.  I wish that I could say that it was easier since I had made the nightstands but there were still some major mistakes made in the building of the project.
The design is pretty simple.  I wanted a simple, straight forward desk that would not hold a lot of stuff.  It was supposed to hold a printer, but I think that changed.  It can but it makes it a very tight fit.  It was going to have a single drawer to hold pencils and a note pad.  We found out after that will also hold a wireless keyboard.
The main difficulty was the size of the top.  There is an undercut bevel that would not fit on table saw.  I had to cut it with a circular saw.  It did take a lot of cleanup afterwards.  The jointing of the three pieces also proved to be a challenge that I was not ready for.  I did it by hand first because my planer could not edge plane the pieces. I ended up cupping the boards.  I ended up running the smaller piece through the planer to edge joint the piece.  That gave me a reference surface to match the other two pieces.  It was a pain, but the glue joints came out great.
The other issue I had was a complete mistake that I should have known better.  I was moving the base and the top clamp came off.  I was using 5-minute epoxy and it had been clamped for 30 minutes.  I did not put the clamp on because I figured it was cured enough.  The back to joint separated just enough to make me annoyed.  I did not fix it because the back is going to be up against the wall.
I like how the desk turned out and it works well.  I also got the dove tails fight this time


Friday, May 29, 2020

Bedroom Furniture: Nightstand


This was a quarantine project.  I had purchased the lumber for the project just before the shelter in place order had been issued.  This is what I would consider fine furniture, which is out of my comfort zone.  I had determined that this bedroom furniture was going to try out more traditional joinery.  This would be mortise and tenons and dove tails.

I worked with my wife on the design and material selection.  We like the simple clean design, so we went with a mission style look.  There were aspects of the aesthetics that were not decided until we started putting the parts together.  My wife liked the red-brown tone, so we went with cherry wood.  Which I am grateful for, because walnut would have been expensive.  Some of the design features I wanted to incorporate a couple of things.  The first was putting in a USB outlet. The second was open/slatted sides. 

The USB outlet was simple, but I made it complicated.  I did not want a cord hanging down the back of the cabinet.  I hollowed out the back of one of the legs and then put in a piece that was cutout in the middle to house the cord.  After the sides were put together, I dilled into the hollowed-out section to pull the cord through.  I realized before drilling that my tenons went through the hollowed-out section, so I needed to rethink where my holes where located.  Installation was harder than I wanted, but easier than expected.  I took string and put it in one hole and with a vacuum and sucked it out the other end.  Then I used the string to pull through the wiring for the USB charging port.  The wires are connected back together and then connections are put together using heat shrink tubes. 

The slatted walls were done by grooving the rails and then putting slats in the groove.  It really was not very difficult, and I simplified a lot of the details.  There are small pieces that needed to be put in the spaces between the slats.  I cut out the curves on the scroll saw so there was a top and bottom to the parts and they were unique to each pair.  I my try to use the router and a template for the next time.


There was a fair amount of learning from this project because this is not a type of woodworking that I do.  Here are some of the key insights:
  • The legs have dimension.  When cutting all my rails I cut them to the width and depth of the nightstand.  I am grateful I figured out the mistake before gluing it all together. It allowed me to practice forming my tenons again.
  • Rough lumber is not as scary as I thought it would be.  I could only get rough lumber and I have never worked with it.  There are some things that I have had to take into consideration.  The first is surfacing it then putting a straight edge on it.  It is not as difficult as a thought it would be.  It is not like the stuff I got from work a few years back. 
  • Tenons don’t need to be supper long.  I made them one inch long.  They were going into 1 ½” legs.  I should have made them 5/8” long.  The tenons were not that difficult; it was the mortises.  They were a pain to clean out.  I will also make them wider than 5/16” next time.  The rails are ¾”+ thick.
  • Epoxy: I don’t know.  It is the first-time using epoxy and it does fill in gaps.  It was a little messy and there was a fair amount of waste.  I have to say the joints are strong.
  • Dove tails are easier to cut on a scroll saw.  I cut a couple of test ones out by hand.  I learned quickly that a cheap coping saw is no good for cutting out waste.  It was a pain and the blade moved everywhere.  It was easy to set the angle and cut on a scroll saw.  It is probably the same on a bandsaw.  Now if I just put the pins and tails on the correct part. 
  • Rulers and tape measures become scales.  I have known this for some time, but it really came out in this build.  I needed to keep with in my constraints of height, width and depth.  Thickness of the boards was when all the saw marks were removed with a planer.  Groove thickness was based on what looked good.  Parts changed as things were put together.  The measuring devices were used more for consistency purposes rather than getting to a specific measurement.  That being said, I still depend heavily on my tape measure.
  • Good joinery makes the assembly a lot easier.  The nightstands came out square and I did not have to worry about making sure all the parts were at the same spacing because all of that was planned for in the joinery.

Overall I am pleased with the look and design.  My wife choose the hardware and it looks better than the ones I was looking at.  Now onto the computer table.

Saturday, September 28, 2019

The Built in Cabinet Install for a Friend


A couple of months ago, a friend of mine asked if I could help with replacing a lot of their cabinets due to water damage.  I agreed and the process was started.  It is good that I work for a cabinet company and run the sample shop.  That made the cabinet parts easy.  There were three parts to this project: the bathroom, built in hall cupboards, and a laundry room.
The easiest was the bathroom install.  It was a standard cabinet off the shelf.  We their current cabinet was 31” tall and I replaced it with a 33.5” tall cabinet.  So the mirror had to move up and the wall soap dispenser had to be removed.  Other than that pretty easy install.  It was nice installing some of our cabinets for firsthand experience.
The built in was all custom cabinetry. The heights and widths were fine but the depth was 20”, not standard.  This is where the sample shop came in handy.  I removed all the toe kicks from the units so I could change the height.  I also was able to cut the back side of all the cabinets to 20”.  That was the easy part of the install.  When I measured for size, I measured the back of the cut out to the floor.  The back was higher than the front.  The right side was lower than the left and the left wall was out of plumb by 3/8”.  Needless to say there was some pushing and shoving and beating until the pieces were in place.  I am also glad for fillers and moulding.  It was definitely used.
The laundry room unit was two standard kitchen bases.  Sounds easy until the dryer ductwork went behind the cabinets and the plumbing went through the cabinets.  It was a lot of cutting and at times was nerve racking.  It went in well until I installed the door and drawer next to the wall. They hit the door frame.  I had to move the entire unit over one inch.  Thank goodness for fillers.  Overall they were happy with the outcome and I was happy it was done.
Here are some lessons learned.  Tools are heavy and I don’t like carrying them around.  I am glad my son won the Triton competition because that is the most modular table saw and workbench I have (on loan from my son).  I am realizing the value of battery operated.  I could have avoided hauling around my air compressor if I had battery operated nail guns and they do exist.  If I was in the business it would be something I would be looking at.  Nothing is ever plumb or square and moulding helps out.  I am sure there are tricks that I don’t know about but the job was completed and I am glad that I was able to do it.  Not sure if I will do it again soon and it will not every become a career.

Thursday, February 1, 2018

Ikea

I think that people either love Ikea for the product that they make or they hate it because they see it as temporary and cheap.  I started building furniture because I did not want the cheap furniture that was in the stores at the time.  Over time I have developed a respect for their business and the product they bring to the market.  Here are a couple of things that I have grown to respect and they might be surprising coming from a woodworker.

Quality – Ikea is consistent.  Their product looks decent for the price.  When I buy something from them I know what I am going to get.  I know where they have used a cheaper part to cut cost.  I know that I am not spending money on the parts that are going to be immediately thrown away; packaging, instructions, guides.

Cost – They have gone to great lengths to cut out cost.  I know that I am not going to get it anywhere cheaper for the quality that I am receiving.  Even the items that are not furniture related.  I remember when coating the scrap blocks to give away, butcher block oil was expensive.  Then walking through Ikea, I found it for a quarter of the cost and double the size. 

Convenience – If you don’t live near one it is not all that convenient.  I have found I will cost compare what it will cost me and what I can get at Ikea.  I now look at projects and ask a couple of questions.  The first is do I want to make it?  How long does it need to last? And how much is it going to cost me to make verses buy?  Here are a couple of examples.  We were looking for a smaller bookshelf in for the family room.  It was a temporary item because we hope to buy a home sometime (not soon).  It was an easy choice to buy a $25 unit than make a $50 one for a couple more inches and better joinery that would take 2-3 weekends.  

Minimal Risk – I know that I am not going to have Ikea furniture forever.  I figure it will last 3-5 years depending on the use.  I do not plan on moving with it.  If it works great if it does not make it so it does.  I don’t have a problem experimenting with their stuff.  Recently we purchased a dresser for my oldest.  I was looking online at taking prints and rubbing them on wood.  I used this furniture as an experiment piece.  Color came out bad black and white did all right.  I was not thrill but my oldest was happy.  I would never try something like this on something I had made.

I have a respect for what Ikea offers and value revere them has a great business.  They set the standard for RTA cabinetry and have a great design and marketing group.  I see them as a valuable source of information and ideas.  Just for the record I do glue in the wood dowels even though they say I don’t have to.

Monday, July 24, 2017

The Pizza Peel

My family loves to make and eat pizza.  It has been a while coming and I was having plans of grandeur of what my pizza peel was going to look like and how it was going to be made.  I wanted to have an inlay of the letter "A" in it.  made of hickory and walnut.  This is what came out:

I wanted to do those things, but I also just wanted to get out in the shop and make something.  I had some glued up hickory and that is what I used.  The design was my largest pizza stone as a template.  and then I added a handle on the bottom of it.  The hardest part was putting the profiles on the handle.  It was a matter of putting scrap underneath to support it while I ran it through the router.  Sometimes it is good to just get back out in the garage.

Tuesday, February 14, 2017

My New Sawhorses and Table


It has been a long time since I have completed a project and I really need to get something done.  The saw horses were to fit two needs and a desire to try something.  Our coffee table/ kids table has been pretty well destroyed.  For some reason my kids think it is a trampoline and are shocked when they get hurt jumping on it.  I needed a new one but I wanted to function as a homework table also, maybe a serving table, coffee table, and just a general purpose table.  My wife and I were walking though Ikea and I saw this adjustable height table leg design.  I knew that is was the design I wanted.  I had to make some small changes because it was not very adjustable once it was set up. 
I do not have a workbench in my shop; it is a folding table from my Grandmother.  Although it is very useful it is starting to wobble pretty badly and it is a good height if I am putting equipment on it to machine parts.  The top is starting to show its wear and I should probably replace the top in the near future.  So the adjustable sawhorses would be great.  They would also be a lot easier and lighter than the metal ones that got rid of a few years ago.
One of the main reasons I wanted to do this project was because I wanted to do compound angled legs.  This should not be a hard process and it wasn’t once I figured out how to do it, but getting to that point was a mess.  It started out with the drawings.  I could not get my model to come together, probably because I was doing it wrong so I started to cut and machine parts before I was done with the drawings.  That was my first mistake.  Just to ruin the story, this project was a complete failure from what the intended purpose.  However they work and I like how they turned out.
The first of the major mistakes was cutting the angles wrong.  I thought for some reason I thought I had to make mirror images of the legs with opposite angles.  Apparently, all the legs are the same, it just depends on what is top and bottom.  This is the reason I wanted to make angled feet.  I lost about an inch of length on the legs because of this mistake.  This compounded the fact that I did not account that the angles would also reduce the height of the project a few inches.  I thought it was going to be less than an inch.  The next design flaw that I had, which I fixed before machining a bunch of parts, was locking the extension posts in place.  I was just going to let them float which means any horizontal force would cause the table to shift of the bottom assembly.  It was a good thing that I decided to push through the design after I cut the legs wrong.  Things did go much more smoothly after the design was complete.
After both sets were complete, I was kind of disappointed that they were not as tall as I thought they would be.  Then I checked the model and realized why.  My other design fail was not allowing enough room for chairs to fit between the legs of the table.  There are a lot of easy solutions, and I think it will work.  The kid’s table is now very strong and heavy.  I don’t think they will be knocking over all the time.  The saw horses are a couple of inches shorter than I want them to be, but it is nice to have the ability to raise the table when doing assembly and finishing work.
The table has a kitchen island top on it.  This is another one of the perks of working at a large cabinet manufacturer.  It is quite heavy and a very good work top.  The top for my garage table is particle board with melamine.  There are reasons for the holes.  One main one is the handle holes.  The second is that I have 36” bar clamps that will mount to the top. However, the top is 42” wide.  I will be putting beech around the edge of the board to protect it.
I am putting the plans up on instructables for free.  I hope to be using this site a little more.  If you have not seen what my plans look like please take a visit here.  My plans for purchase will also have instructions and a bill of materials.  Instructables is forcing me to take more pictures of the process which is nice.

Wednesday, September 7, 2016

Toy Shelves

This is one of the bittersweet moments of woodworking.  My very first project that I ever designed and made was a set of book shelves.  This was over 17 years ago.  Two years ago it was re-purposed to hold toys in the toy room. 
Last year we were at Ikea looking for some things.  I don't remember what we were buying.  I know that many people think that Ikea furniture is cheap and will fall apart over time.  I believe in you get out of something what you pay for it.  So here is my little rant on Ikea.  Yes, a lot of their particle board low end furniture is cheap.  It will last one move and then fall apart.  However they have some really nice things that cost more.  These are not meant to last forever but they will last longer, the quality is better and the look is nicer.  What Ikea does really well is optimize yield of materials, and and standardization.  That being said, Ikea is a great for:
  • Idea generation
  • Non furniture related items
  • One hour of free babysitting 
  • Random items that seem to be expensive everywhere else, like cutting board oil.
I had heard that Ikea does a fantastic job of maximizing board usage and designing to be assembled by the end user.  I am not a real fan of ready to assemble (RTA) furniture because it does not hold up well.   This was the main reason that I got into woodworking. 
 TROFAST Storage box IKEA Fits in TROFAST frames. Can be stacked when completed with a lid.
Now moving on with the story.  We found these buckets that would be perfect to fit a lot of the toys and would look better than the re-purposed book self.  So we purchased a couple of the bins and I said I will get around to making some units to hold the bins.  After 8 months I finally finished them.  I made six in total out of birch ply and maple.  This is where I discovered that Ikea really does maximize their material usage.  Without even trying all the parts fit on 2 sheets of 5'x5' Baltic birch plywood.  The depth of the bins was perfect.  I literally had a 2" waste rip cut and a 4" waste cross cut on both boards.  I could of had less on the cross cut but I wanted to stay at 29" tall.  There are also four different sizes of bins.  All the holders are at 5" centers and there all the bins are equally centered in the unit.  Ikea may have a bad wrap for some cheap furniture but they got so many things right in terms of manufacturing.
This week I cut up the book shelves that started me on this incredible journey.  Hopefully in the next few weeks I will be able to ceremoniously burn the solid wood pieces.  It lasted 17 years and I am surprised it lasted that long.  I really liked brad nails and drywall screws at the time.  The funny thing is that I specifically  remember buying the  fine thread drywall screws when I was tearing the face frame apart.  My son help cut the sides down and throw the pieces away. 
Here are a couple of interesting tidbits about this project that are fun facts.  The height of the units are 29 1/2" tall.  This is the standard height of a desk.  In the near future I will be putting a top on them.  Each of my kids will have a desk when they are ready.  I pre-finished all the parts.  This was a pain to mask off all the grooves and edges but it paid off in the end.  Sanding everything in the flat was a huge benefit even though it took up the entire garage to finish them.  I used plastic barbed dowels in the back rails.  This way I could use my clamps to hold the face frame in place.  And the most interesting parts, at least for me, was this project cost me less than the original book shelves including the bins.  The toy shelves have more storage space.  Here are the key reasons for the cost difference, I buy my lumber at a lumber yard not a big box store, I now know more about yielding material, and I use 1/2" ply instead of 3/4" ply and that saved a lot on weight.

This is what my kids did to the shelves after they were put in the toy room:

Thursday, May 12, 2016

New Scroll Saw Stand

A couple of weeks ago I had my first taste at the craft fair market.  It really was not a craft fair, we were at a lumber yard to promote the woodworking club.  We were allowed to display some of the things we have made and if people wanted to they could purchase our things.  I did not sell anything but that was not expected.  While I was there I used the club saw and stand.  The stand was simply made and low to the ground so that people could see what was being cut.  It was actually pretty comfortable to work on. 


I had brought a large table which was heavy and awkward.  I figured if I was going to do more of these craft shows and demonstrations, I should probably prepare for them a little better.  I liked the idea of the simpleness of the club's stand but it was too big for me to haul around and store. I got to work and started to design.  My constraint was I wanted to be able to haul everything around in a compact car (Corolla).  That is not very much space.  My largest dimension was going to be the base in which the saw was going to be bolted to so that is what I started with.  Then I moved to a folding table designed that would fit inside the top portion.  The handle came in at this stage of the design.  This made it an "easy" carrying table.  I was going to have square wings then I laid out the cut pattern and realized this was going to be just under a full sheet of 3/4" which would weigh about 70 lbs.  This was a previously unknown design constraint that I had.  So the next objective was to take weight out.

That is where all the holes come from.  I took out a lot of the excess that was not needed in the center sections.  Reduced the wings so that they were not acting as a table to put stuff on.  After the weight had been addressed, I had yet to figure out how to attach the top box to the table section.  I wanted to make sure it was secure and not move during operation.  The first ideas were to add a block to the front and screw it in or to screw it in underneath the wings.  I wanted to make it easy to disassemble and getting under the table to screw it in did not make much sense.  I really did not want to add a block to the front because I wanted my logo and contact information there.  I compromised on moving the attachment blocks to the sides and adding threaded inserts.  I did the same for attaching the saw to the top. 

In the end it collapses down in to a box that is 12" wide 19" tall and 30" long.  After being concerned about the weight, I never weighed it.  I can pick it up without much strain.  It is made from one sheet of 3/4" plywood, four 12" piano hinges, eleven threaded inserts and lots of wood screws.

I don't need to defend my use of tools but I am going to anyway.  This thing is screwed together.  It is shop furniture designed to serve a single purpose.  I am not ashamed to screw things together.  I am not trying to prove my woodworking skills, I am proving my design skills and this is an awesome design. 

I did use a CNC to cut out all the parts.  Could I have done it by hand? Yes, but I did not want to.  What took me 2 hours to cut blanks, program and run these parts would have taken me 6-8 hours in the shop in set up and marking.  I wanted to do more things with those 4 hours.  With that being said, it would have looked better if I had done it by hand.  When cutting out the holes on the CNC, I left about 1/16" of material so the cutout doesn't fall out and damage the machine.  I could then cut the thin material and flush it up with a hand router.  The force and speed of the bit pushed the back material and separated the veneer from the ply.  It cleaned up all right with the round over but some of the damage was a little extensive.
I have tried it out a couple of times.  My kids need a few more inches for them to comfortably use it standing up.  I need a more comfortable chair than a foot stool.  I really like it and it is comfortable to work on.  I am not sure what I am going to do with the plans.  I am not going to do an excessive detailed procedure.  I might just offer them up for free.  It is shop furniture. 
Next is the table saw cart.

Monday, February 1, 2016

Step Stools or Time Out Chairs

So I got the step stools/time out chairs completed.  These are going to be for Valentine's gifts for my sons.  Each of them have there name carved into them.  I used a CNC for that part.  I was going to post pictures with their names but for internet safety I am posting the one I did with no name.  My wife may use this one for me.I used a CNC machine to make the template and engrave the names.  The rest was done by me and power tools.  This would be the first time I did through tenons.  I may not do them again.  It is not that they were difficult, I just did not like the look and when I screwed up, it is very noticeable.  I screwed up plenty.

The wood is maple and African mahogany.  It was the first time working with African mahogany.  If machines well with the gran but against the grain it behaves like a brittle poplar.  Stain is my go to shellac and I put on five coats.  I am a little worried about the step portion.  I never sanded the the top figuring the grain raise will provide traction. The step is about 8" from the ground and the total width is 12".  Fun quick build.

Now the question is what trouble can my boys reach now?


Tuesday, July 7, 2015

Sanding Table

I have been wanting to build a cabinet for my belt sanders that would hold all the toy making parts, wheels, axles, and other things as well as my sanding supplies.  These parts were stored in several cabinets and on shelves.  I had separated the toy parts with containers and it worked but was not really happy with it.  So over the holiday weekend I put this cabinet all together.  I had cut out all the carcass components and made the frames the weekend before.

I had two storage goals that I wanted to accomplish with this cart.  The first was to store all the sand paper.  My belts and paper were just sitting on shelves. I wanted to hang my belts, keep the paper flat and my drum sanders out of reach of my kids.  They liked to take them and use them as wheels.  I made a pull out drawer where I can hang my large belts.  In the future, I would like to upgrade to a 6" x 48" wide belt, so this drawer can accommodate the increase in width and length.  On the other side of the drawer holds some of my small templates and all my drum sander parts.  This way I hope to keep better control of the parts.  I then have pads and smaller belts in a drawer

The second goal was to organize and store all the parts for making toys.  I have accumulated a lot over the years.You can sort of tell that I like the treaded wheels and have a lot of them.  It is also apparent that I need to order more of the 1 1/2" wheels.  This is one of the benefits of having everything separated out.


The other benefit was getting rid of all these extra containers.
There are some drawers that I did not show.  They contain my finishing chemicals and supplies.  They were not in an area easily accessable to my kids but I did want them out of sight.
 
Over all I removed three pieces of furniture with this cart.  Shop looks a little better, still a ways to go.

The design was a work in process over the course of the build and I made some assumptions that bit me later in the build.  The dimensions and over all look was pretty set.  The first big assumption I made was that I had enough tolerance to grow my partition back 3/4" for my small drawers.  I had to cut my large drawers to accommodate the partition.  More of a pain than a problem.  Second problem was that I did not allow enough room for the glides on the sanding belt drawer.  I was able to barely squeeze the drawer in.  I think I have less than a 1/32" between the bottom and the glides. 

I do plan on adding doors to finish it off.  I did not have wide enough stock to do them at the time.  I do not plan on finishing it.  I really do not see the point of finishing shop furniture.   The top is a kitchen island top from work.  This is one of the perks of working at a cabinet shop.  It is not food grade so could not be sold.  Everything else is maple and plywood.

It was a good weekend build.  The only bad part was that I started to notice that the board would drift when ripping on my table saw.  The problem was easy to diagnose, my fence and blade are not parallel.  It is a relatively easy adjustment except there is no more adjustment in the fence which means the motor is moving on the table.  I was hoping for a few more years before my saw needed to be replaced and replace it with a cabinet saw.  I am hoping to dig in this weekend to straighten it out. 


Monday, August 11, 2014

Cubby Book Shelves

I was asked a little over a month ago to make a cubby shelf unit for a preschool.  The owner pretty much had the design they wanted which made it a lot easier than designing the unit from scratch.

 There was some pretty big huddles that I needed to overcome to make this unit.  The first was that I no longer have a truck.  5x5  birch sheets do not fit in a mini van.  I ended up tying them to the roof.  I really was scared that I would end up with 5 sheets of birch ply all over the street.
Although they did not fall off, the rope loosened to give the boards about a  1/2" of play in all directions.  This was enough to make me nervous and I will have to tie down better if I do this again.
I also worried about how I was going to put it together.  The largest claps I have are 48" bar clamps and these units were going to be 60" long.  I thought about stringing claps together but that used up clamps fast.  I ended up borrowing 60" pipe claps from work.  They worked great.
The next was the finishing.  There were a lot of areas that were going to be very difficult to finish after everything was assembled.  I decided to pre-finish the parts.  I went through an entire role of masking tape to mask off all the grooves and glue joints.  It took forever.  I did everything but the outside faces.  I probably should have pre-finished everything.  I will say it was a pain to mask everything off and then take all the tape off, but is was in the end easier to pre-finish than it would have been to finish the assembled units.
The first dry fit was not as good as I had hoped.  I did all the grooving on a CNC mill.  I could have done it on my own with a handheld router.  The CNC router saved me about two Saturdays and a lot of set up.  I messed up on the notching distance so I had to finish the cutouts by hand.  This was a minor price to pay for the time saved.
Overall it was a good project.  I only made a couple of mistakes and all but one was covered up well.  it is a pretty sturdy unit which should last a long time.  Everything is grooved into place.  I also arched the frame rails just because I could.  I am kind of tired of the square look so I wanted to try something different.  It was interesting to use the drum sander on the long arches.  There must be a trick to getting one smooth arch.  I think I would push too hard because the arched went bumpy.  It took a little while to sand out the bumps.
The build was fun, I think toys are more my thing.

Wednesday, April 16, 2014

My bathrooms

The company I work for is launching a new line at one of the big home improvement stores and just did their production pilot.  For the most part it went really well, however we could not take the pilot samples and put them into inventory.  Largely because we machined the parts on the unfinished side of the plywood.  A mistake that will not happen again.  This line is kind of a step forward for us.  The carcass is made out of plywood and the features are a little more decorative then we normally do.  I am actually really please how this line turned out and excited to see what it is capable of doing in the market place.  So what happened to all the samples, they were sold to employees for a bargain price.  I picked up enough to do two of the bathrooms.  So here are the before pictures: 
Upstairs


  Downstairs

 Just because it was funny when he walked into the bathroom and got this perplexed look on his face and asked "Where did it go, daddy?"

I knew there would be challenges but not ones I was expecting.  The demo was pretty straight forward. The hardest part was getting the tops out of the bathroom.  A hammer made that job a lot easier.  The second challenge was the connections from the wall to the faucet.  I replaced all the hoses because honestly the solid metal ones are prone to cracking while out of the house.  I had a 1/2" compression fitting out of the wall and a 1/2" fitting to the faucet.  I purchased the 1/2x1/2 flip valve and the 1/2x1/2 hoses to redo the plumbing.  I guess "flip" means the the threads are smaller than 1/2" so my hoses did not fit and I had to go back to the store for new hoses.  The good news is that I had not installed the sinks yet so changing was not a big issue.
Next major issue was the P-trap.  Same size cabinet in should mean the same plumbing in.  Nope. The cabinets I put in are 4" taller than the original.  I thought just a simple extension. Nope. The contractors who put in the plumbing put in the bathtub plumbing and everything was glued in except the P-trap.  So I re-plumbed everything.  In hind sight, I should have plumbed it correctly rather than using the bathtub fixtures again.  It all works and no leaks.
I am actually disappointed that I could not do the master bathroom also.  They did not pilot any units in the profile I wanted for the upstairs bathroom.  The extra 4" in height makes a huge difference.  My first install of a bathroom was not too bad.  I was surprised how easy the cabinets went in.  All I have to do now is install hardware and touch up.

 I still need to get the mirror up in the down stairs bathroom.