Sunday, September 20, 2020

Honey, I Blew up the Toys

I had a fair amount of off cuts of several thicknesses of cherry from the furniture that I have been building.  I wondered for a little bit what to do with it.  My small series was made mostly of 3/4" material so it made since to just double it, sort of.  

The problem was that the lumber I had was not all the same thickness and too small to run through a planer.  I took some liberties on thicknesses and dimensions to make it work.  I only had enough off cuts to make four different models.  I probably like the jeep and the plane the best.  I would like to see what the dump truck would be doubled.  Maybe after a few more projects.

Fun project to double the size.  I needed to enlarge a couple of the templates.  I took a couple of liberties with the dowel placements and widths.  It was also surprised how big they were compared to the originals.  I will probably do this again when I get different thicknesses of lumber.


Tuesday, August 18, 2020

Bug Chest of Drawers


My middle child needed a dresser for his room. He had drawers that went under his bed but we lofted the bed so the drawers just moved around the room when he needed space.  I put together a design for a painted chest of drawers that he could help in the color and painting.  

I figured I would use cheaper materials, but I don't know how much cheaper they were.  The side frames are poplar and the rest of the carcass is MDF.  The drawers are the cheap import plywood that is a pain to work with.  I used a stain blocking primer, because I knew there were places in the house that I would need to prime also.  I purchased a quart of flat bright white interior paint and half a gallon of orange acrylic paint.  For the top coat, I used water based polyacrylic.  

Construction is pretty simple.  The sides are a frame and panel where everything was pre-finished.  The only thing that I would have done different would be to stencil the patterns on before assembling the panel.  Th insert panel is MDF that has been primed and painted.  The face frame is MDF and screwed into the sides.  I had some left over poplar so those were made into the back rails.  It has a full back panel and the top is 1/2" MDF.  I should have used 3/4" but I did not want to buy a sheet for just one top.  The top is held in place by construction adhesive.  I would have liked a couple of mechanical fasteners.  

I did have my helper paint.  It was good for him to be part of the project.  He did do all the the stenciling.  I did learn a couple of things with working with my son on this project.  The first and most important is that I cannot do it for him.  He rolled the primer on all the parts and put on the white paint.  I did do some touch up work, but he did do a god job.  I also learned that there is a time limit for how much he will do.  Once the time is up, I can work on the parts of the project that he is not able to do.  It is hard to hold back "suggestions" on how I would like to see it done.  He needed to chose the stencils and placement.  He is a very linear thinker that thinks outside the box.  The stencils are all oriented in the same position, but the color scheme is all his.  I would have liked it a little more symmetrical but he wanted nothing to do with it. he also did not like the scorpion and centipede stencils.  

I think the project works well for my son.  He was extremely proud of what he did and how it turned out.  I would have liked it to be a little cleaner in the paint area but a lot of that was my fault.  He now has a place to put away his clothes, now we will see if his room stays cleaner longer.  

The inspiration for the project was first to have a place for my son's clothes.  After looking at the costs of dressers I thought I could build a better one for slightly over the cost of buying one.  I was looking at around the $220 range. Here is the cost break down and total

hardware $49.98
lumber $77.62
tools $40.17
paint $48.36


Grand total $216.13
If you add in labor at $10/hour (minimum wage and easy calculation), the labor cost alone would be $240.  This brings the total to $456.13.  I know that people would say they would buy it for this much to be nice, but in reality they would go for the mass manufactured one about half the price.  When you look at craft fairs and think things are expensive, the makers are not really making a lot of money because most do not add in labor.  I woodwork because I like to create not to make money.


Wednesday, August 12, 2020

Bedroom Furniture: Bookselves

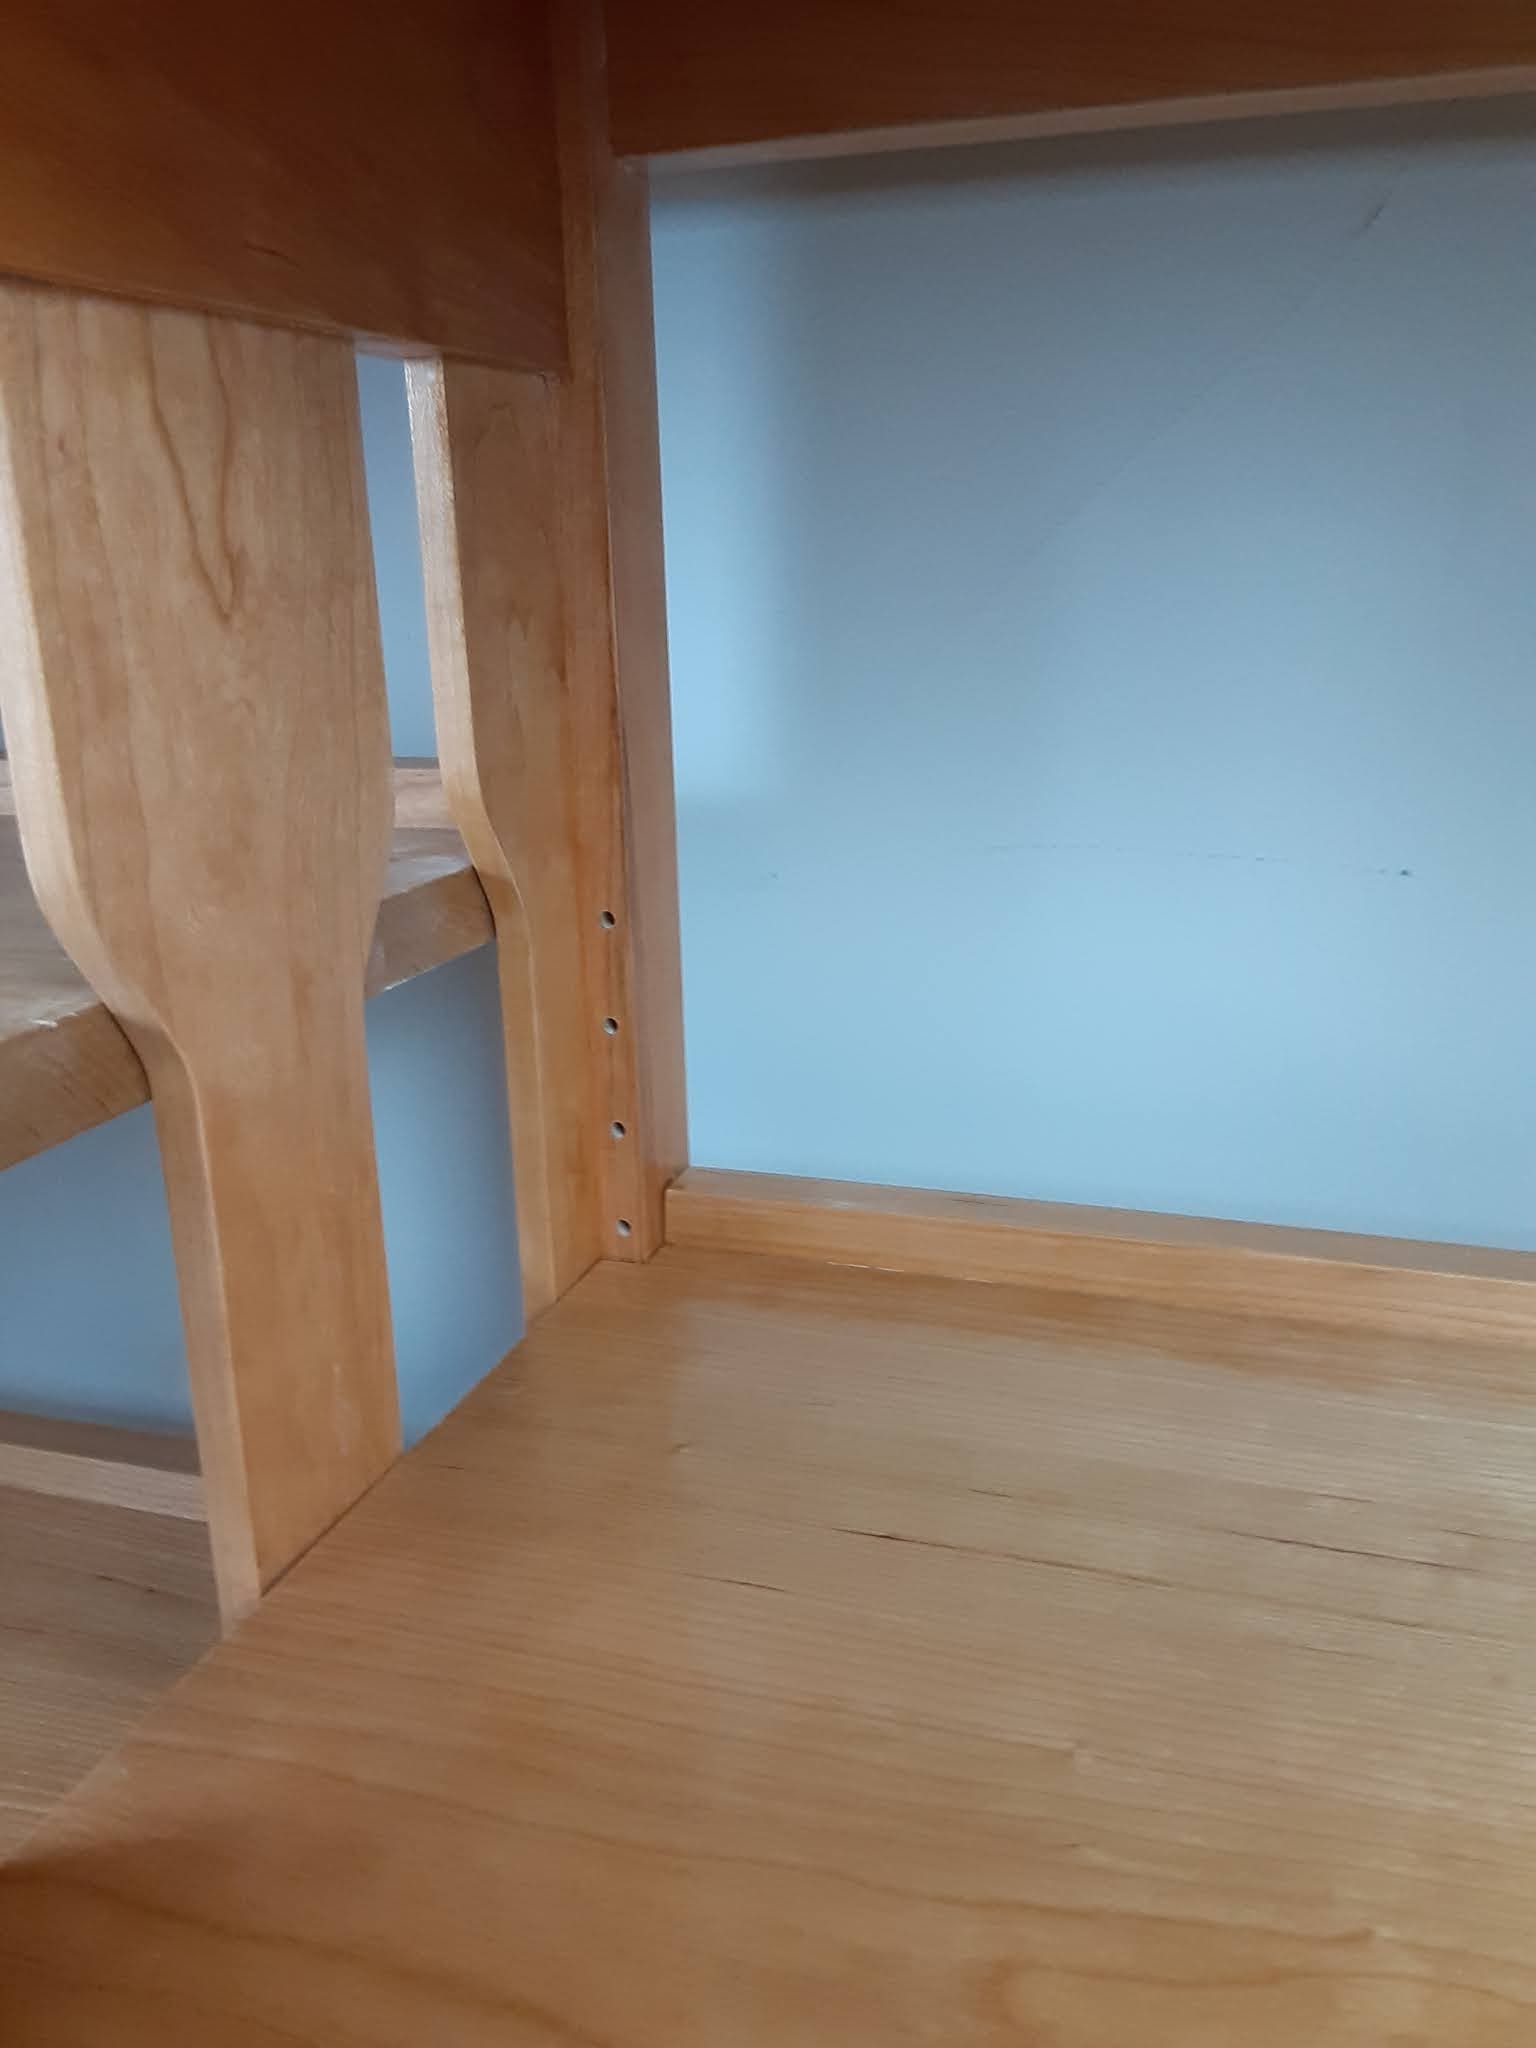
I recently completed the bookshelf for our room.  It is in the same design as the other pieces of furniture.  The bookshelf has open sides with slats and two sections.  One side has one adjustable shelf and the other side has two adjustable shelves.  I did not do a complete design of this, only sketches like the other pieces.  It was designed at 15" seep to handle some of our photo albums. Looking back, I probably could have reduced the depth to 12" and put the photo albums elsewhere.  It is deep but it does work.

The construction of the unit is very similar to the night stands with thicker legs and top.  I purchases 8/4 (1 3/4") thick lumber instead of 6/4 (1 1/4").  That was not planned but it looks good because it is a larger unit.  I used the slats to hide the shelf hardware.  the concept work well.  I used a template to make sure the hole spacing was consistent on each of the legs.  I used a router this time to cut the grooves in the rails that hold the slats in place.  I was hoping this would be more consistent than the dado stack on the table saw.  It was for all but one of the rails.  I am not sure what happened with the one piece.  It all worked out in the end since I cut the slats thick.  I did find out that I do need a better slot cutter than the one that came in the multi pack. The one I have dulled after half way through the parts and started to chip out on the edges.  All joints are mortise and tenon and I would hope that I would have become a little better.  I don't think I have improved much.

The cabinet is totally over designed.  It is all solid wood, even the shelves and bottom panel.  The shelves are 7/8" thick.  I now buy rough lumber, so I just plane to get the defects out and that is the final thickness.  I did have a little issue with the glue up this time.  I glued up the right side panel and left side of the center piece.  with hand cut joints each one fits in one spot.  I had to clean out a lot of epoxy.  The good part was my loose joints were no longer loose.

I am happy with the project and how well it goes with the rest of the set.  I think I will be doing a printer stand next.  I need to test a look before I put design it into the headboard


Tuesday, June 30, 2020

The New Computer Desk


This project went a little faster than expected.  I was working more from home and needed something in a quieter place than the family room.  A desk was planned for our room, it just moved up in priority.  It is a very similar design to the nightstands and constructed in the same manor.  I wish that I could say that it was easier since I had made the nightstands but there were still some major mistakes made in the building of the project.
The design is pretty simple.  I wanted a simple, straight forward desk that would not hold a lot of stuff.  It was supposed to hold a printer, but I think that changed.  It can but it makes it a very tight fit.  It was going to have a single drawer to hold pencils and a note pad.  We found out after that will also hold a wireless keyboard.
The main difficulty was the size of the top.  There is an undercut bevel that would not fit on table saw.  I had to cut it with a circular saw.  It did take a lot of cleanup afterwards.  The jointing of the three pieces also proved to be a challenge that I was not ready for.  I did it by hand first because my planer could not edge plane the pieces. I ended up cupping the boards.  I ended up running the smaller piece through the planer to edge joint the piece.  That gave me a reference surface to match the other two pieces.  It was a pain, but the glue joints came out great.
The other issue I had was a complete mistake that I should have known better.  I was moving the base and the top clamp came off.  I was using 5-minute epoxy and it had been clamped for 30 minutes.  I did not put the clamp on because I figured it was cured enough.  The back to joint separated just enough to make me annoyed.  I did not fix it because the back is going to be up against the wall.
I like how the desk turned out and it works well.  I also got the dove tails fight this time


Tuesday, June 9, 2020

Catapults


I think I cope with stress by designing and building weaponized toys.  The ping pong ball guns and now the catapult.  I can remember the stress I was under when I made the trebuchet and the rubber band Gatling gun. The intent of the catapult design was for science.  The design was to allow to figure out the best angle of trajectory, where the rubber band should be placed, and the length of arm.  
I probably oversized the catapult.  The length of the catapult is 24” and the plans need to be printed on 11x17 paper.  I don’t regret the size; it works well.  I might come back and make a desk top version.

The saw tooth design is so the dowels can be moved to change the angle of trajectory, where the rubber band is placed.  It also allows for the arm to easily be replaced.  Over the process of making it, I realized the location of the rubber band was not important but how many rubber bands. 

My kids assembled most of the catapults.  The oldest choose not to participate.  The younger two glued and screwed most of the pieces and cut the dowels to length.  They installed the hooks and placed the location of the dowel stops.  I actually think that I was able to teach the middle child some tricks. 

Here are the mechanical advantage lessons that I think I taught him.  If he remembers them that is a different story. 
  • Wedges to split glued parts that are not supposed to be glued.  We used a chisel to separate a clamping joint that got stuck together with squeeze out
  • Lever arms, we used a screwdriver to put in the multiple hooks required for the project
  • Blade pinch, he learned what happens as you pinch a blade when trying to cut material. 
  • What happens when… The catapult has several different options that can change trajectory and tension.  He was able to figure out that different angles caused the marshmallow to fly differently.  He was also excited when I added a second rubber band and told him I doubled his power. 

Overall, the project went well.  They are a little bigger than I thought they would be. They launch marshmallows and ping pong balls about 40 feet.  The kids had fun.

Friday, May 29, 2020

Bedroom Furniture: Nightstand


This was a quarantine project.  I had purchased the lumber for the project just before the shelter in place order had been issued.  This is what I would consider fine furniture, which is out of my comfort zone.  I had determined that this bedroom furniture was going to try out more traditional joinery.  This would be mortise and tenons and dove tails.

I worked with my wife on the design and material selection.  We like the simple clean design, so we went with a mission style look.  There were aspects of the aesthetics that were not decided until we started putting the parts together.  My wife liked the red-brown tone, so we went with cherry wood.  Which I am grateful for, because walnut would have been expensive.  Some of the design features I wanted to incorporate a couple of things.  The first was putting in a USB outlet. The second was open/slatted sides. 

The USB outlet was simple, but I made it complicated.  I did not want a cord hanging down the back of the cabinet.  I hollowed out the back of one of the legs and then put in a piece that was cutout in the middle to house the cord.  After the sides were put together, I dilled into the hollowed-out section to pull the cord through.  I realized before drilling that my tenons went through the hollowed-out section, so I needed to rethink where my holes where located.  Installation was harder than I wanted, but easier than expected.  I took string and put it in one hole and with a vacuum and sucked it out the other end.  Then I used the string to pull through the wiring for the USB charging port.  The wires are connected back together and then connections are put together using heat shrink tubes. 

The slatted walls were done by grooving the rails and then putting slats in the groove.  It really was not very difficult, and I simplified a lot of the details.  There are small pieces that needed to be put in the spaces between the slats.  I cut out the curves on the scroll saw so there was a top and bottom to the parts and they were unique to each pair.  I my try to use the router and a template for the next time.


There was a fair amount of learning from this project because this is not a type of woodworking that I do.  Here are some of the key insights:
  • The legs have dimension.  When cutting all my rails I cut them to the width and depth of the nightstand.  I am grateful I figured out the mistake before gluing it all together. It allowed me to practice forming my tenons again.
  • Rough lumber is not as scary as I thought it would be.  I could only get rough lumber and I have never worked with it.  There are some things that I have had to take into consideration.  The first is surfacing it then putting a straight edge on it.  It is not as difficult as a thought it would be.  It is not like the stuff I got from work a few years back. 
  • Tenons don’t need to be supper long.  I made them one inch long.  They were going into 1 ½” legs.  I should have made them 5/8” long.  The tenons were not that difficult; it was the mortises.  They were a pain to clean out.  I will also make them wider than 5/16” next time.  The rails are ¾”+ thick.
  • Epoxy: I don’t know.  It is the first-time using epoxy and it does fill in gaps.  It was a little messy and there was a fair amount of waste.  I have to say the joints are strong.
  • Dove tails are easier to cut on a scroll saw.  I cut a couple of test ones out by hand.  I learned quickly that a cheap coping saw is no good for cutting out waste.  It was a pain and the blade moved everywhere.  It was easy to set the angle and cut on a scroll saw.  It is probably the same on a bandsaw.  Now if I just put the pins and tails on the correct part. 
  • Rulers and tape measures become scales.  I have known this for some time, but it really came out in this build.  I needed to keep with in my constraints of height, width and depth.  Thickness of the boards was when all the saw marks were removed with a planer.  Groove thickness was based on what looked good.  Parts changed as things were put together.  The measuring devices were used more for consistency purposes rather than getting to a specific measurement.  That being said, I still depend heavily on my tape measure.
  • Good joinery makes the assembly a lot easier.  The nightstands came out square and I did not have to worry about making sure all the parts were at the same spacing because all of that was planned for in the joinery.

Overall I am pleased with the look and design.  My wife choose the hardware and it looks better than the ones I was looking at.  Now onto the computer table.

Tuesday, May 19, 2020

The past 60 days

I really don’t know how long it has been since we have been under “shelter in place” orders but 60 days sounds like a good round number.  I typically do not post these entries to the public on my blog but I feel the need to share my feelings. 

It has been interesting watching my social media feed.  I liked seeing all the fun things that people were doing.  Honestly it also sometimes made me feel jealous that I may not been included, or it was impossible for me to do.  Now, these types posts have gone and replaced with memes and spiritual/uplifting messages.  These messages are nice/funny/uplifting, but I cannot connect with them as I could with people and pictures.  It is lonely on social media these days.

I consider my self one of the fortunate ones.  I am still employed.  My family and I are healthy. However, I have, as a new manager, to make decisions that affect others.  I have had to let talented employees go, cut hours and have seen revenue streams dry up.  I have friends and family lose employment and health.  It is not fair.

I took my family across the country away from friends and family at the beginning of the year in hopes to start something better.  We were here long enough to start to make acquaintances and building friendships to have the doors slammed shut and connections fade.  We wave to our neighbors and to people we see. I have plenty of people around me but no one to talk to.

We had plans to do so much with the kids.  We are grateful that we were able to make it to DC once before the shutdown.  Parks and trails are closed.  There are so many things that we want to do that we crossed off the calendar.  The kids are bored and feel they need to occupy the time with screens.  I want to go places, but places are closed.

When the news started that we might shut down, I planned out some projects to fill any extra time that I might have during this time of uncertainty.  These included a couple of nightstands with traditional joinery, the projects with the kids, and some home improvement projects.  Many are almost completed, and I am running out of the things that I planned to do.  There is nothing to do anymore.

I am hearing that things are opening with conditions attached.  Slowly, and some quickly, states are starting to go back to a new normal.  Information is confusing and often contradictory.  We are trying to do what is asked.  These times are uncertain and confusing.

I am using technology to connect, have meetings.  Face to face social interaction has been replaced with face to screen.  My company is starting to invest in better AV equipment to cut down on travel expenses.  We are connected in several different platforms. It just is not the same as discussing a problem in a room, face to face.  I see and hear others but do not feel and connect with others.

If you have read this and are concerned, don’t be.  I am fine.  Things are different and they will be for some time.  We will get through this.