I was kind of tired of my make shift cut off cart. It was a modified tool cart that I used in my original garage and was no longer needed when I moved into a place with a slightly larger garage. I was finally done with it and designed this one.
This was probably one of the fastest projects I have ever done. From start to finish it took about 4 hours. It took me about an hour to draw and dimension it out, 20 minutes to program (yes, I used a CNC router), 40 minutes to cut and rout parts, and two hours to assemble. This cart needed to hold all my small parts that are not yet destined to become blocks and all my dowels. It serves most of the function I designed it for. It does not work well with wide stock. There were a couple of take away points from this project.
The first is that my garage shop does not need to look like a beautiful masterpiece of all that I can do. Let's face it, I make toys and utility cabinetry. Yes, some of my stuff is nice but it is nowhere near fine furniture. This cart is made out of particle board. It is cheap and will will work. I did not bother hiding grooves and glue squeeze out.
I was not looking for quality work. I was confident that the CNC router did its job accurately and I did not have to worry about things fitting together. I wanted to counter sink the screws but could not find my bit. The joys of kids. Screws stick out a little and that is ok. I have found my countersink bit and am not going to go back through to sink the heads of the screws.
Material was not really a concern. If I had my choice I would make it out of plywood. I did not need to so why spend the money. This was going to be for my eyes only anyway. I needed it to support the weight so 5/8" particle board was sufficient.
I knew what I wanted this cart to do. It was to hold off fall and my dowels. It does that. Looking back at the design I may have wanted to make it 2" wider to handle wider stock. Not a big deal. I am please with the way it turned out.
The last take away, more on the light side, was make sure there is plenty of glue in the bottle. I had about a 1/3 of a bottle of glue and figured that was enough. I was wrong, just barely. I was gluing the sides to the partitions (last step) and on the last glue line and ran out. I was shaking the bottle and trying to get every last drop out before the glue skins over. The good thing is that I buy glue by the gallon so it was just a refill thing. I was lucky.
Glad this project is complete. Now I need to make a sanding cart (my next shop project). This one is going to take a little longer.
Projects and discoveries from an obsessed woodworker who likes to make wooden children's toys
Monday, May 18, 2015
Wednesday, April 8, 2015
Things are changing
There are some pretty big changes that are going on. First of all there have been some changes to my blog. I have added a few tabs to help explain the designs and projects I am selling. I have set up an Etsy Shop where I am selling plans. I will also be selling finished product but that will be not as often. I also have a Facebook page. This is where I will be posting updates, current projects and give away promotions. Please like and follow for updates. I am not sure how to link this blog to the face book page. If anyone knows can you please share?
I am hoping to get a new banner for the shop and a new look. I have been putting this off for a while and this is a huge step for me. I do not feel I make "fine" wood products. I have come to the realization that I do not have to make "fine" products, I have to make durable products and functional ones. That is why toys are fantastic!
I have hit a mile stone in my shop. I have used up all my pine. Not that pine is bad it is something that I do not buy very often anymore. I have moved more to hardwood. It makes a little cleaner and durable product. I also have the need to make some shop cabinets, so it is going to be a fun year.
On a side note I have discovered a favorite tool. I actually one it at a raffle. I think that it is only available at Rockler, but it works. It is a silicon glue brush.
I have been using my finger, stick or not even spreading glue at all on my projects. I really did not want to buy throw away glue brushes because I felt they were a wast of money. It does what it is supposed to do: spread glue evenly. Now I do not have to use my fingers and make a big mess. It takes a couple of days for the glue to dry on the brush and then it peels right off. The only thing I do not like about it is that it skins over quickly. If I let the brush sit for an hour or more, I will get dried chunks of glue in my fresh glue. Other than that I have been impressed. Sometimes it is the simple things.
Tuesday, February 17, 2015
First Set of City Trucks
I just finished a set of three city trucks. It was a pretty humbling experience. The last of the designs came out so well that I was pretty confident in these designs. The first and biggest mistake I did was not look at the wheels before putting them in the design. I used 1 1/2" in wheels instead of the 2" wheels in the dump truck and grader. I needed these to look smaller because they were smaller vehicles. I assumed they were the same peg and width as the 2" ones. They are not. They use a 7/32" peg and are only 1/2" thick. The proportions were a little off. Not to mention I drilled all the holes wrong and had to plug an re-drill them all. The second issue was I mixed up parts and did not realize it until after I had machined them all. So I added to my scrap block pile. The last big mistake was proportions. I had grand visions of the cherry picker and that is what they became, too grand. I designed a small maintenance truck and put a high wire lift on it. For this lift to work I would need to put out riggers on it.
I did a couple of things different with these trucks. On the final dry fit I posted pictures on Facebook with the instructions to criticize it. I did not want the "looks great" posts, I want to improve. I appreciate all the comments from the post. So the new designs will not change the wheels. I am kind of locked into the wheel size. The rear wheel base will be widened to bring the wheels out. The Cherry picker and stake bed trucks will now have duel axles. The lift on the cherry picker is going to see a 30% reduction.
There were a couple of things I learned that were quite unexpected. The first one was when I was sanding the engine blocks. These are made by gluing up several pieces of wood and cutting the angle. The angle cut goes through one of glue joints. I labeled my parts and it just happened that my label showed through on one of the pieces. I would have never expected for the wood to be that transparent and to cause a problem. When I was assembling the cabs, I was doing them with my kids. I was assembling parts on a piece of counter top. First thing was I did not check for movement after all the parts were clamped together. The second problem was there is a slight warp to the counter top that I did not realize. Minor problems but they caused problems for the wheel alignment. On a side note, I highly encourage having kids help with building to toys. It makes them some much more special to them.
Tow Truck
This is my wife's favorite. There are some features of this truck that may seem insignificant but there was a lot of thought that went into them. The first was the cuts in the arm for the hook. This also proved to be a failure by design. There are splits in the arm to make it bend when being put in so that the fit would be tight. The negative space in the arm was too close to the hook that it broke when putting the dowel in. I ended up clamping the base of the arm to provide the rigidity needed to insert the dowel. The next design will have less negative space but I still recommend clamping the splits together.
The other design feature is the dowel that is inserted at the base of the hook. Tow truck designs either have a metal hook or the hook breaks at the base. I have repaired several so I hope this works.
Flat Bed Truck
Not a supper detailed truck and it doesn't capture the eye with some cool trick. The cool thing about this vehicle is that it is the base for the other two trucks in the series and possibly more.
The stake bed can be removed. I think next time I will make the bead a little narrower and use 3/8" dowels instead of the 1/4". I think the dowels will break in the holes with rough play.
I really like the fronts of these trucks. IT will be another one that I remake and see how it turns out. The only bad thing about the bed of this truck is that it is very similar to the cherry picker. I mixed of the two beds drilled holes and did not understand why the parts did not line up.
Cherry Picker
This was probably the one that I was most excited about and the most disappointed when finished. It is not because of the how it works but the overall balance of the truck. The lift is too big for the size of the vehicle. I am currently redesigning to make it look more balanced. The main key take away from this project was how to make tight fitting parts without a mechanism to tighten the parts together like a bold or screw. I tried making small cuts in the wood to make it spring like. The problem was with a cut it creates a point for a crack to propagate. This is not good in wood. So I drilled a hole at the end of each cut. This seemed to work.
It holds the bucket but it is not all the time. It is a pretty heavy arm.
I thought I would do a band saw box for the bucket. While mine came out ok, I felt this was not with in the criteria I was designing for. While a band saw is a great tool, I do not expect a lot of people have them. The redesign will have a large diameter hole drilled into it rather than a cut out.
I tried to think so some special details for this vehicle and this was one of them. I pegged the boom lift mount to the truck. I thought it was a great idea but it can barely be seen.
The truck looks good and I am glad I did it. I understand a little bit more the advice of "make every project twice." This one will be made again, a little different and a little better.
Tuesday, February 10, 2015
Bucket of Blocks
So my wife was at a baby shower a little while ago for a lady having twins. I make tug boats for baby shower presents. These were twins so she asked if I had any buckets of blocks ready. I did, so we packed one in a container and gave it as a present. My wife came home and told me that "we" were in trouble. She said the blocks were a hit and there was some interest.
A couple of years ago I would have a competition to win these buckets and the contestants slowly faded away because you really only need one bucket. So I stopped doing it. So I will try this again.
Here is the history of the blocks. I found, like most wood workers, there was an accumulation of small off cuts of wood being collected in various parts of the shop. I usually put it in a burn pile whenever I got the urge to clean out. It does hurt to burn the wood. For the most part the lumber is good quality and never had any finish. I really did not have any use for these small pieces because I was making larger pieces. I ended up sanding the edges and making the first set for my son and a few smaller sets to donate to LDS services. Over time I collected more scrap and figured it was a good idea to give the blocks away. Then I stopped for a while but still collecting the off fall (scrap).
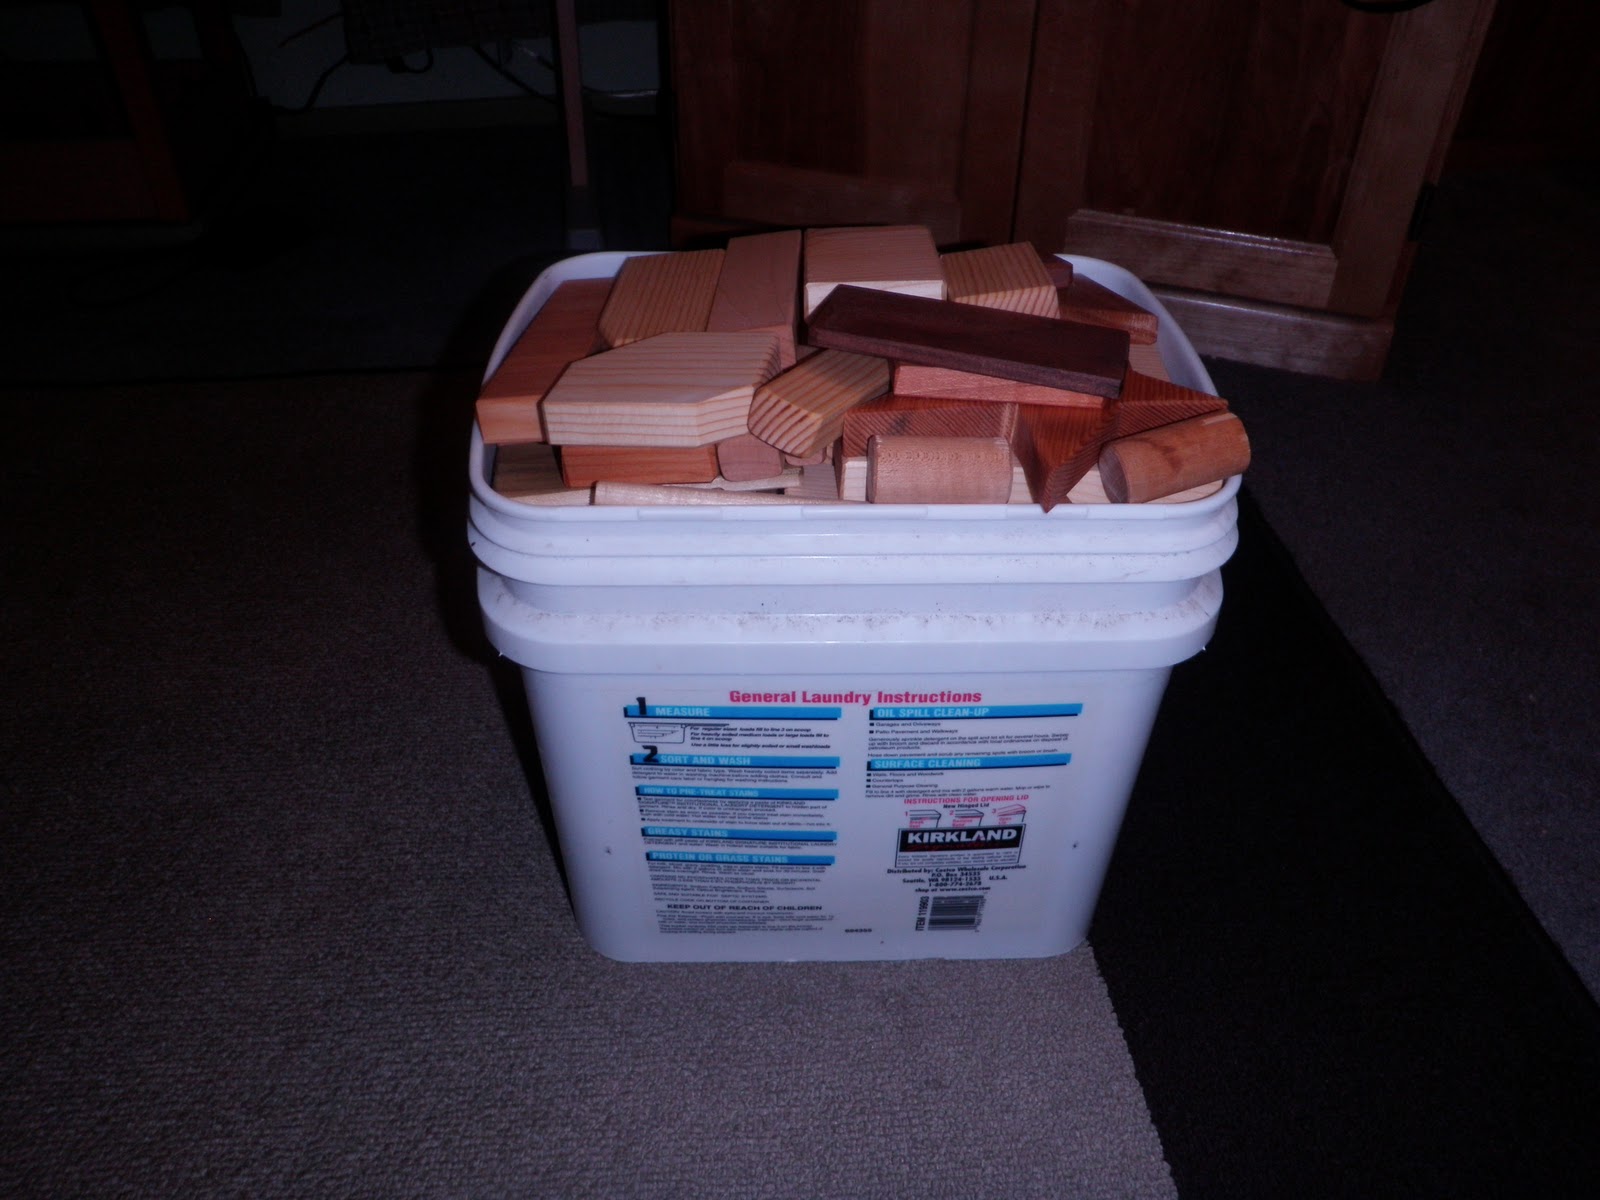
Here is what is included in this bucket of blocks: It is a bunch of random widths and lengths of blocks. They have different shapes and sizes. If you receive a bucket please go through them and throw out any that you feel are choking hazards. I am usually pretty good about getting them out but opinions may differ. All blocks are sanded with edges broken and have a coat of mineral oil. The woods will vary depending on what I have been making. There may be pine, walnut, poplar, cherry, oak, maple, beech or others. All blocks are made from virgin lumber without defects and knots. Some of these blocks are made from extremely hard woods. Blocks that are thrown have a potential of doing damage. It is a 5 gallon bucket (about 100 pieces) if you are looking for a size reference. I will need to keep the bucket I keep the blocks in. The blocks will be delivered in a box.
Now for the competition. I am going to do two with multiple opportunities to win and you can do both.
Here are some images of past block sets given away.
If you would like to cheat, I will be more than happy to give you a bucket of blocks if you purchase this plan for me. You will incur the wrath of my wife who has stated that I cannot buy the pattern.
On a side note: I have oak, maple and cherry smoking chips if you like to bar-b-que. Just another reason to know a wood worker.
A couple of years ago I would have a competition to win these buckets and the contestants slowly faded away because you really only need one bucket. So I stopped doing it. So I will try this again.
Here is the history of the blocks. I found, like most wood workers, there was an accumulation of small off cuts of wood being collected in various parts of the shop. I usually put it in a burn pile whenever I got the urge to clean out. It does hurt to burn the wood. For the most part the lumber is good quality and never had any finish. I really did not have any use for these small pieces because I was making larger pieces. I ended up sanding the edges and making the first set for my son and a few smaller sets to donate to LDS services. Over time I collected more scrap and figured it was a good idea to give the blocks away. Then I stopped for a while but still collecting the off fall (scrap).
Here is what is included in this bucket of blocks: It is a bunch of random widths and lengths of blocks. They have different shapes and sizes. If you receive a bucket please go through them and throw out any that you feel are choking hazards. I am usually pretty good about getting them out but opinions may differ. All blocks are sanded with edges broken and have a coat of mineral oil. The woods will vary depending on what I have been making. There may be pine, walnut, poplar, cherry, oak, maple, beech or others. All blocks are made from virgin lumber without defects and knots. Some of these blocks are made from extremely hard woods. Blocks that are thrown have a potential of doing damage. It is a 5 gallon bucket (about 100 pieces) if you are looking for a size reference. I will need to keep the bucket I keep the blocks in. The blocks will be delivered in a box.
Now for the competition. I am going to do two with multiple opportunities to win and you can do both.
- First - How many buckets of blocks do I have currently completed? The person with the guess closest to the actual number with out going over will win the blocks. Guesses should be in increments of a 1/4 of a bucket. One guess per person.
- Second - What is the next project I will be starting? Only one guess per person. I will be starting them on the holiday weekend and there is more than one correct answer.
Here are some images of past block sets given away.
If you would like to cheat, I will be more than happy to give you a bucket of blocks if you purchase this plan for me. You will incur the wrath of my wife who has stated that I cannot buy the pattern.
On a side note: I have oak, maple and cherry smoking chips if you like to bar-b-que. Just another reason to know a wood worker.
Subscribe to:
Posts (Atom)